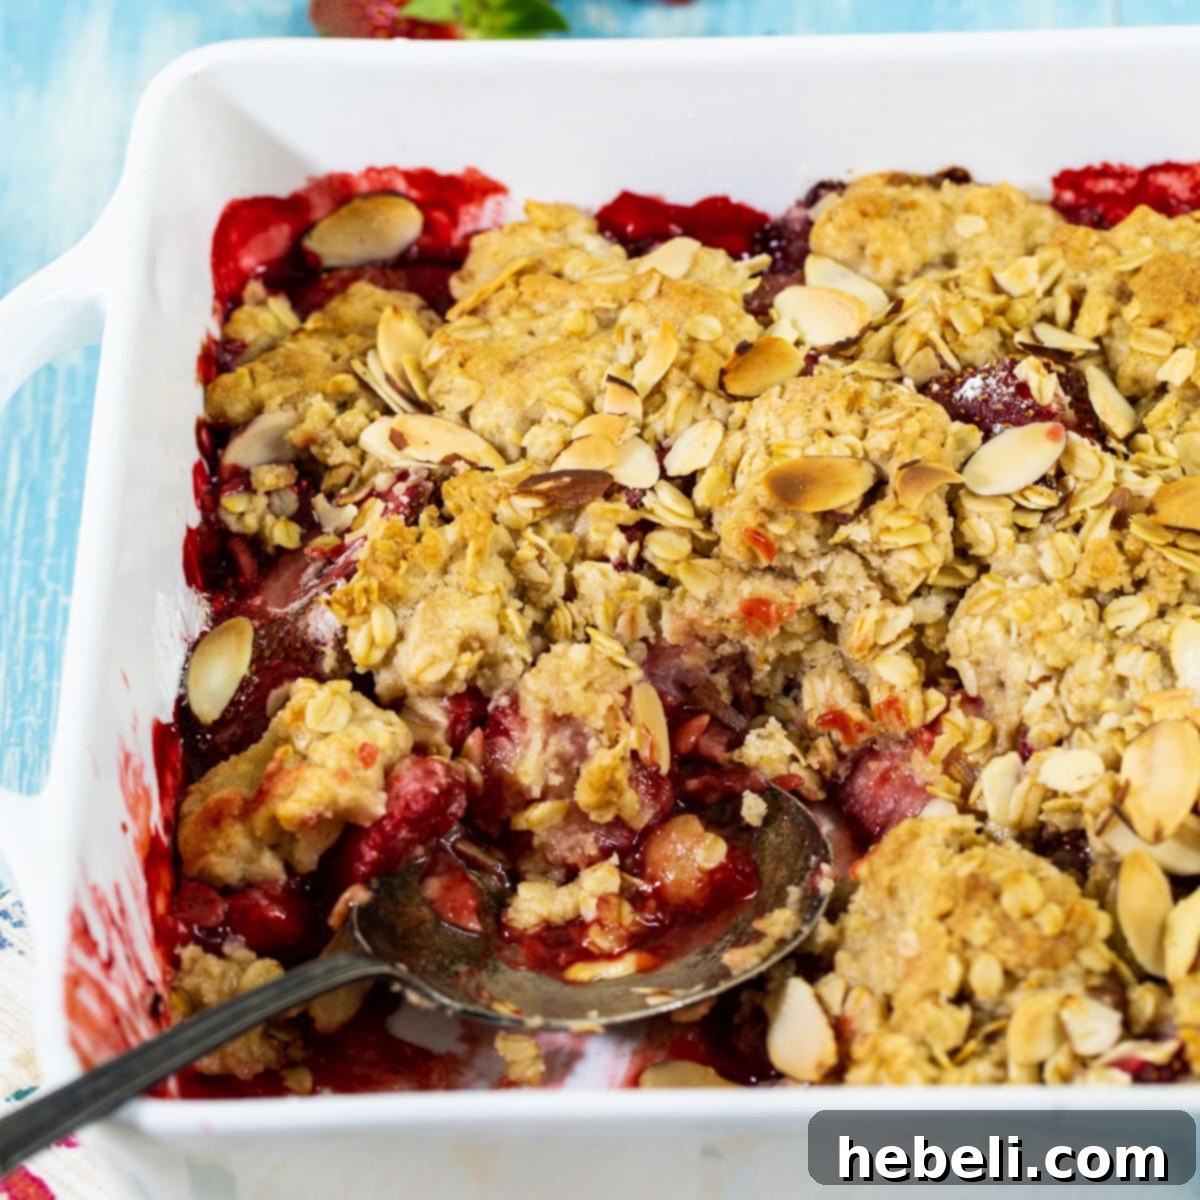
Homemade Strawberry Crisp: Your Go-To Summer Dessert with a Crispy Oatmeal Topping
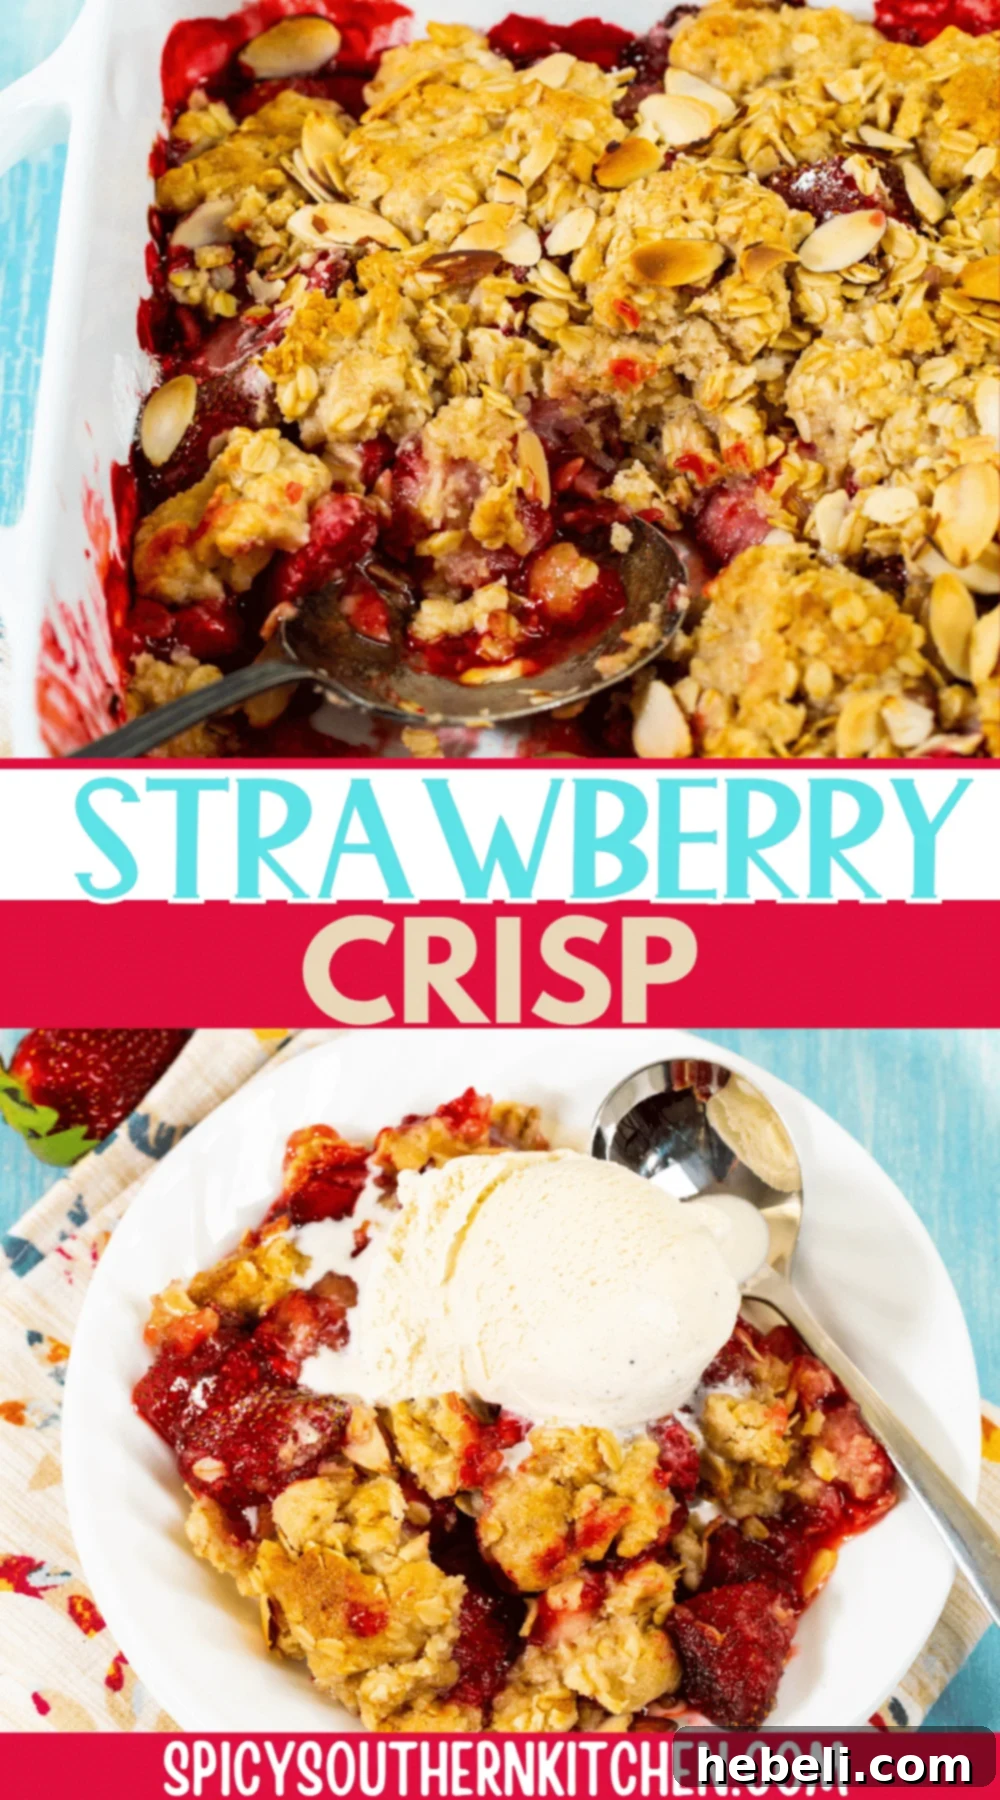
Welcome to the definitive guide for crafting the most delectable Strawberry Crisp you’ll ever taste! This classic dessert features a vibrant, sweet, and incredibly juicy strawberry filling, perfectly complemented by a golden-brown, irresistibly crispy oatmeal topping. It’s an absolute dream for spring and summer, embodying the fresh flavors of the season in every warm, comforting bite.
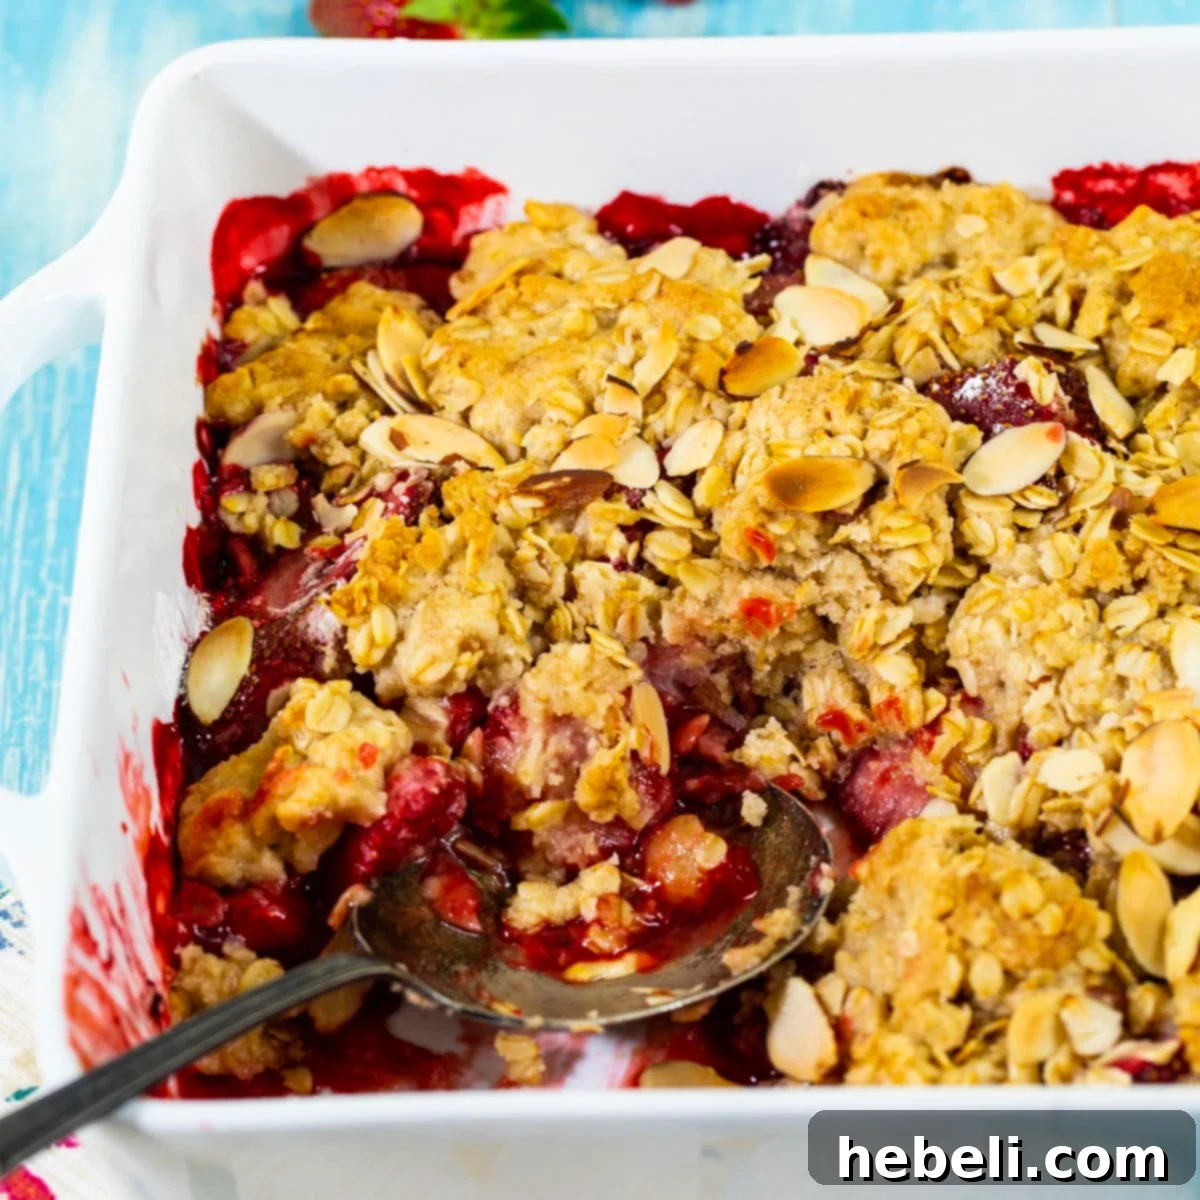
Imagine sinking your spoon into succulent, bursting strawberries, gently sweetened and thickened, beneath a crunchy, buttery layer of oats and spices. This simple yet sophisticated dessert is incredibly versatile, making it the ideal treat for family dinners, potlucks, or a quiet evening indulgence. Serve it warm, perhaps with a generous scoop of vanilla ice cream or a dollop of whipped cream, and prepare for rave reviews and requests for the recipe.
Why This Strawberry Crisp Recipe Will Become Your Favorite
This isn’t just another dessert recipe; it’s a celebration of simplicity and vibrant flavor that truly highlights the best of fresh strawberries. Here’s what makes this Strawberry Crisp truly special and why you’ll want to make it again and again:
- Effortless Preparation: Forget complicated techniques or lengthy ingredient lists. This recipe is designed for ease. You can have it prepped and ready to bake in a mere 10 to 15 minutes, leaving you more time to enjoy your day or spend with guests. It’s perfect for busy weeknights or impromptu gatherings when you need a show-stopping dessert without the stress.
- Pure Strawberry Brilliance in Every Bite: The filling is deliberately kept simple, allowing the natural sweetness and vibrant flavor of fresh, ripe strawberries to truly shine. A judicious blend of granulated sugar, pure vanilla extract, and a hint of almond extract enhances the berries without overpowering their delicate taste. A touch of cornstarch creates that perfectly juicy, yet not runny, consistency that holds its shape beautifully.
- The Ultimate Crispy, Buttery Oatmeal Topping: What’s a crisp without an exceptional topping? Our recipe boasts an irresistible crumble made from a delightful blend of old-fashioned oats, all-purpose flour, rich brown sugar, granulated sugar, and a touch of salt. Spiced with a warm hint of ground cinnamon and bound together with melted butter, the topping bakes into a golden, crunchy layer that provides the perfect textural contrast to the soft, warm fruit below.
- Versatile & Universally Loved: This dessert is a timeless classic, universally adored by all ages. It’s incredibly adaptable, making it suitable for any occasion – from casual backyard barbecues to elegant dinner parties. Its comforting flavors appeal to almost everyone, and it scales easily to feed a small family or a larger crowd. It’s the quintessential spring and summer dessert, though delicious year-round when you utilize seasonal or properly prepared frozen fruit.
If you’re as big a fan of fruit crisps and crumbles as we are, you absolutely must explore our other delightful creations. Expand your dessert repertoire and discover new favorites. Don’t miss out on our incredibly popular Blueberry Coconut Crisp, offering a unique tropical twist, or our classic, comforting Peach Crisp, bursting with summery sweetness. Each recipe provides a unique take on this beloved dessert style, perfect for celebrating any fruit season.
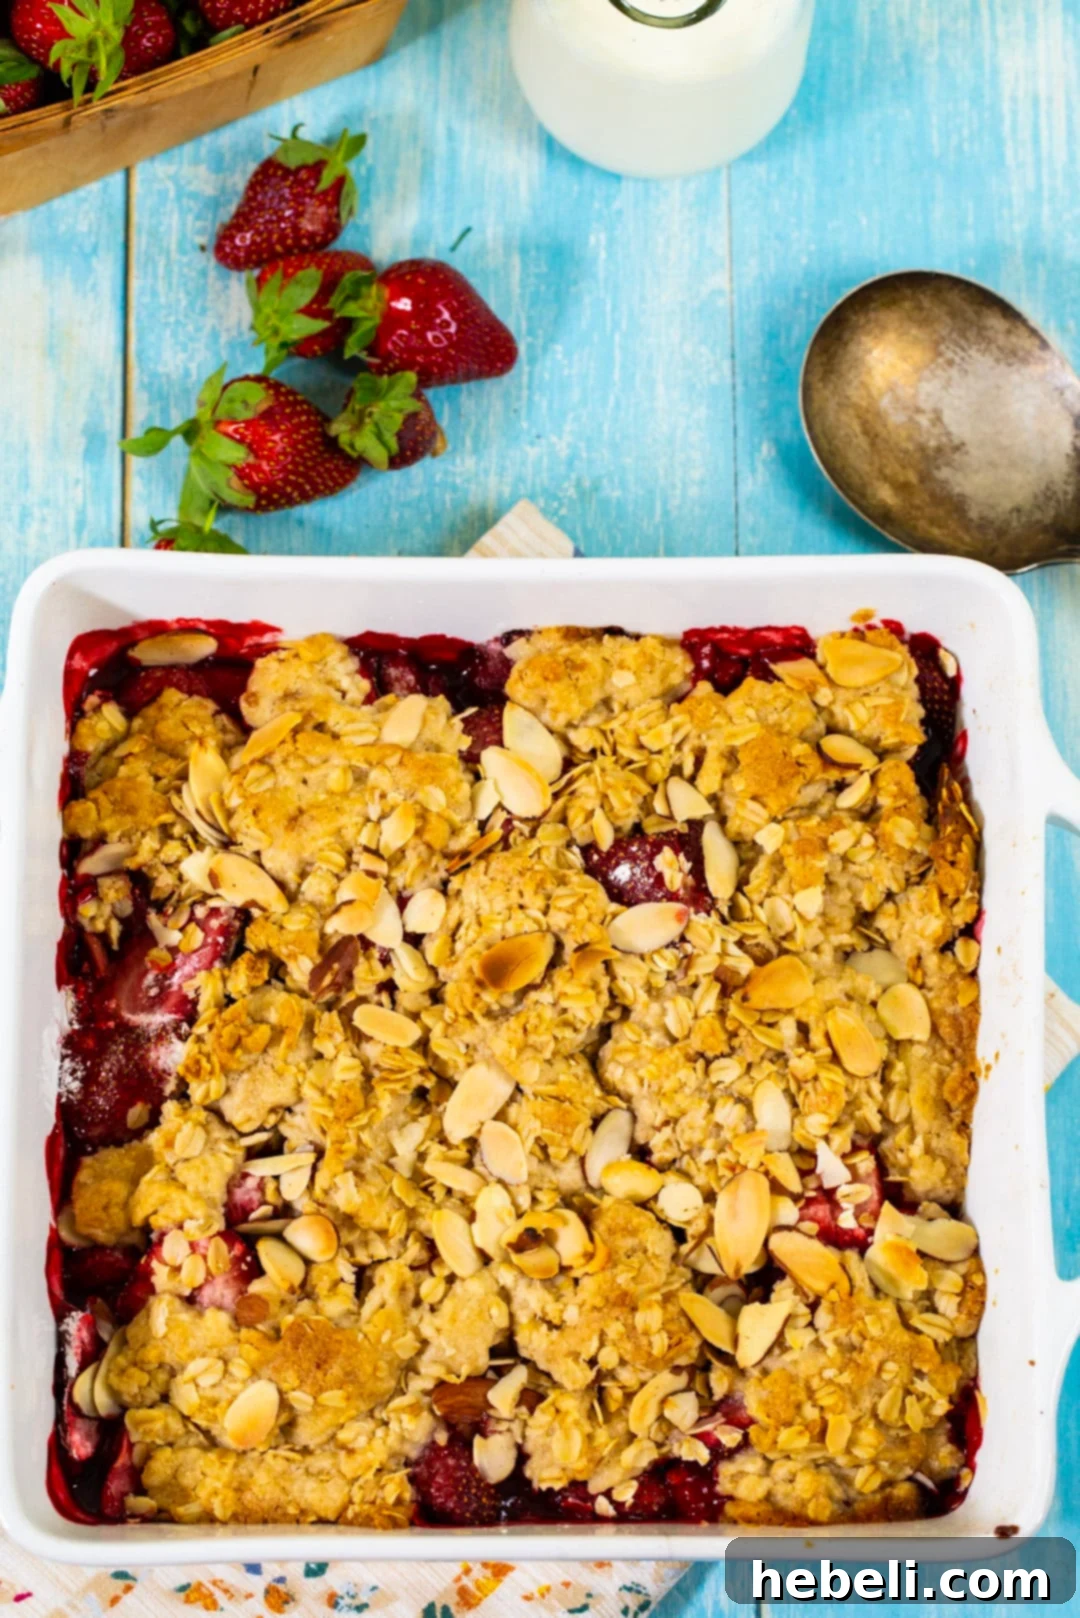
Fresh vs. Frozen Strawberries: Your Guide to the Best Filling
The foundation of any great fruit crisp is, naturally, the fruit itself. For this Strawberry Crisp, selecting the right strawberries is key to achieving a truly exceptional flavor and texture. While fresh, ripe, in-season strawberries are undoubtedly king, frozen berries offer a fantastic alternative when fresh ones are not at their peak.
Choosing Peak-Season Fresh Strawberries:
When strawberries are in season (typically spring and early summer), prioritize fresh berries. Look for those that are bright red from tip to stem, firm to the touch, and intensely fragrant. A sweet aroma is the best indicator of ripeness and flavor. Avoid any berries with significant white patches, soft spots, or a dull appearance, as these indicate they were picked too early or are past their prime.
Mastering Frozen Strawberries:
Frozen strawberries are a perfectly acceptable and often preferable substitute when fresh, high-quality berries are unavailable. They are typically picked at the peak of ripeness and flash-frozen, locking in much of their vibrant flavor and nutritional value. However, a crucial step is required to prevent your crisp from becoming watery:
- Thaw Completely: Always thaw your frozen strawberries entirely before incorporating them into the filling. This allows the ice crystals to melt and release excess liquid.
- Thorough Draining is Essential: Once thawed, it is absolutely critical to drain the strawberries thoroughly. Place them in a colander set over a bowl for at least 15-20 minutes, or gently press them with the back of a spoon to extract as much liquid as possible. This step is vital to prevent a soggy crisp and ensures the filling has the perfect, thick, and juicy consistency. While some recipes suggest adding extra cornstarch for frozen fruit, diligent draining often negates the need for this, maintaining the intended flavor balance.
A Word of Caution on Out-of-Season “Fresh” Strawberries:
We strongly advise against using “fresh” strawberries purchased outside of their peak season, especially if they look pale, firm, and lack fragrance. These berries are often grown for shelf life rather than flavor, resulting in a bland, watery, and disappointing filling. In such cases, high-quality frozen strawberries will always yield a superior crisp with better taste and texture.
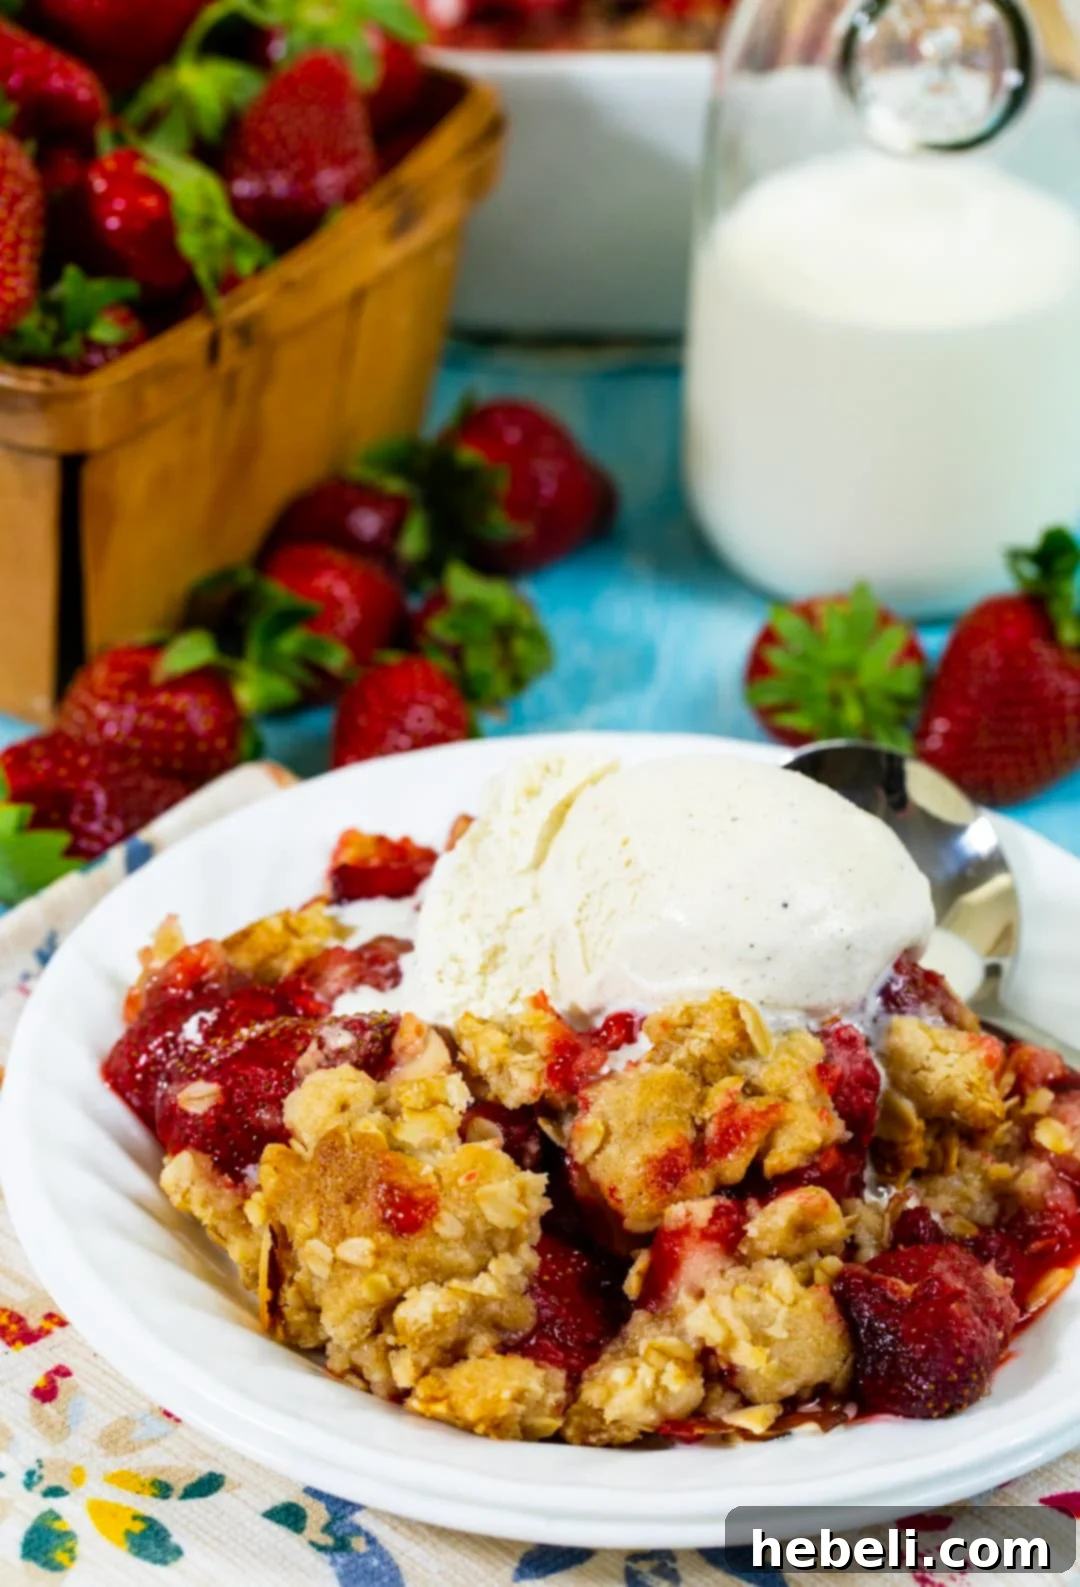
Choosing Your Baking Dish: Flexibility for Your Strawberry Crisp
One of the many delightful aspects of this Strawberry Crisp recipe is its adaptability, not just in terms of ingredients but also in the choice of baking vessel. While the specific dish can influence baking time and final presentation, the core deliciousness of your crisp remains constant. Here are some excellent options:
- 9-inch Square Baking Pan: This is my personal favorite and a highly recommended choice. A standard 9-inch square baking pan offers a generous surface area, ensuring an excellent ratio of fruit filling to crispy topping. This results in a balanced bite where you get plenty of both delightful textures. It’s a classic and reliable option for serving a family-sized portion.
- Deep-Dish Pie Plate: For a more traditional and charming presentation, a standard 9-inch deep-dish pie plate works wonderfully. The deeper sides are ideal for holding a generous amount of luscious strawberry filling, giving the crisp a beautiful, rustic pie-like appearance.
- Cast Iron Skillet: If you’re aiming for a charming, country-style aesthetic and appreciate excellent heat retention, a 10-inch cast iron skillet is an fantastic option. Not only does it bake beautifully, but it can also go straight from the oven to the table, adding a touch of rustic elegance to your serving. Just be mindful of the handle being hot!
- Individual Ramekins: For an elegant and controlled serving experience, consider baking your crisps in individual ramekins. This is perfect for portion control, special occasions, or when you want to create a delightful personal dessert experience for each guest. If opting for individual ramekins, remember to significantly reduce the baking time by approximately 10 minutes, as smaller portions will cook much faster. Keep a close eye on them to ensure the topping is golden brown and the filling is gently bubbling.
Regardless of your choice, always ensure your baking dish is lightly greased with cooking spray or butter. This crucial step prevents the crisp from sticking, making serving much easier and ensuring every delicious morsel makes it to the plate.
How To Make Strawberry Crisp: A Simple Step-by-Step Guide for Perfection
Creating this delicious Strawberry Crisp is an incredibly straightforward and rewarding process. Follow these detailed steps to achieve a perfect, comforting dessert every single time. (For precise ingredient measurements and a handy printable recipe card, please scroll further down the page).
- Preheat Oven & Prepare Your Dish: Begin by preheating your oven to 350°F (175°C). This ensures even baking from the moment your crisp goes in. Next, lightly grease your chosen baking dish – whether it’s a 9-inch square baking pan, a deep-dish pie pan, or a cast iron skillet – with cooking spray or a thin layer of butter. This simple step is crucial for preventing sticking and ensuring easy serving later.
- Craft the Irresistible Strawberry Filling: In a medium-sized mixing bowl, combine your hulled and appropriately sliced fresh strawberries with the granulated sugar, vanilla extract, almond extract, and cornstarch. Gently stir all the ingredients together until the strawberries are evenly coated. The cornstarch acts as a vital thickening agent, ensuring your filling is wonderfully juicy and vibrant but never watery. Once mixed, transfer this bright and flavorful strawberry mixture evenly into your prepared baking dish.
- Assemble the Perfect Crispy Topping: In a separate medium bowl, whisk together all the dry ingredients for the topping: all-purpose flour, old-fashioned oats, packed light brown sugar, granulated sugar, a pinch of salt, and a delightful touch of ground cinnamon. Once these dry components are well combined, pour in the melted butter. Use a fork or your fingertips to mix until the ingredients are thoroughly incorporated and the mixture resembles coarse, buttery crumbs. Evenly sprinkle this irresistible oat topping over the strawberry filling in the baking dish, ensuring good coverage.
- Bake to Golden Perfection: Carefully place your assembled crisp in the preheated oven. Bake for approximately 30 to 35 minutes. You’ll know it’s perfectly ready when the topping achieves a beautiful golden-brown hue and the vibrant strawberry filling is bubbling enticingly around the edges of the dish. For an added layer of flavor and texture, we recommend sprinkling the 2 tablespoons of sliced almonds over the topping during the last 10 minutes of baking. This allows the almonds to toast lightly and become fragrant without burning.
- Serve Warm and Savor: Once removed from the oven, allow the crisp to cool for a few minutes before serving – it will be piping hot! The flavors will also meld and the filling will set slightly as it cools. Serve it warm, ideally with a generous scoop of high-quality vanilla bean ice cream or a luxurious dollop of freshly whipped cream. The exquisite contrast between the warm, sweet fruit and the cold, creamy topping is an experience that is simply divine and utterly unforgettable.
Expert Tip: Mastering Strawberry Slicing for Your Crisp
A common pitfall in many fruit crisps is an overly mushy filling. The way you slice your strawberries can significantly impact the final texture and consistency, ensuring distinct pieces of fruit in every spoonful. It’s a small detail that makes a big difference to the overall enjoyment of your crisp:
The Golden Rule: Don’t slice the strawberries too thin. Thin slices tend to break down completely during the baking process, resulting in a homogenous, mushy filling. We want to experience delightful pockets of juicy, slightly tender strawberry in every bite!
Here’s a simple, easy-to-follow guideline for slicing your strawberries:
- Small Strawberries: For the smallest berries, a simple cut in half will suffice.
- Medium Strawberries: Cut these into three even pieces.
- Large Strawberries: For larger, plump strawberries, quarter them into four pieces.
Following this guide ensures that your strawberries retain some structural integrity and provide a delightful, varied texture in your crisp’s filling, even after bubbling away in the oven.
Storing & Reheating Your Strawberry Crisp for Lasting Enjoyment
While this Homemade Strawberry Crisp is undeniably at its absolute peak when served warm, straight from the oven, any leftovers are still a wonderfully delicious treat! Proper storage and reheating techniques are key to preserving its delightful flavors and textures for a few more days.
- Initial Cooling is Essential: Before even thinking about storage, allow the crisp to cool completely to room temperature. Covering a warm crisp will trap steam, leading to condensation which will inevitably make your perfectly crispy topping soggy. Patience here pays off!
- Refrigeration: Once fully cooled, transfer any leftover crisp to an airtight container. This will protect it from absorbing odors and drying out. Stored correctly, your delicious crisp will keep beautifully in the refrigerator for up to 3 days.
- Reheating for Best Results: To bring your crisp back to life and revive its crispy topping, the oven is your best friend. Preheat your oven to a moderate 300°F (150°C). Place the crisp (covered loosely with foil if you notice the topping browning too quickly) in the oven for about 15-20 minutes, or until it is thoroughly warmed through and the topping has regained some of its coveted crispness. While individual servings can be briefly reheated in the microwave, be aware that the topping will likely lose most of its crunch.
- Serving Leftovers: Just as with a freshly baked crisp, enhance your reheated portions with a refreshing scoop of high-quality vanilla ice cream, a generous dollop of freshly whipped cream, or even a drizzle of homemade custard. The warm-cold contrast remains a classic and irresistible combination.
- Freezing Recommendation: We generally do not recommend freezing a fully baked strawberry crisp. The primary reason is that the texture of the strawberries can become overly soft, mushy, and watery upon thawing, compromising the integrity of the filling. Additionally, the crisp topping almost invariably loses its desirable crunch and can become quite soggy. For the best culinary experience, enjoy your strawberry crisp fresh or within a few days from the refrigerator.
More Delightful Strawberry Recipes to Explore
If you find yourself with an abundance of fresh, luscious strawberries or simply can’t get enough of their sweet, aromatic charm, we have a fantastic collection of other recipes that celebrate this beloved fruit. Expand your strawberry repertoire and discover new ways to enjoy these seasonal gems with these irresistible dishes:
- Strawberry Layer Cake: A truly showstopping dessert, perfect for special occasions, featuring tender cake layers generously filled with fresh strawberry frosting.
- Strawberry Cobbler: Another comforting baked fruit dessert, similar to a crisp but with a delightful biscuit-like topping, served warm and incredibly inviting.
- Strawberry Amaretto Trifle: An elegant, layered dessert combining fresh strawberries with a hint of almond liqueur, delicate sponge cake, and creamy goodness.
- Strawberry Filled Angel Food Cake: A light and airy dessert, where a cloud-like angel food cake is generously filled with a luscious, fresh strawberry mixture, perfect for summer.
- Strawberries and Cream Scones: Ideal for breakfast, brunch, or afternoon tea, these tender, buttery scones are studded with sweet strawberries and best served with clotted cream.
- Strawberry Lemonade Bars: A refreshing and zesty treat, combining the tangy brightness of lemonade with the natural sweetness of strawberries in a convenient, delightful bar form.
Strawberry Crisp: The Full Recipe Details
Rated 5 out of 5 stars based on 2 votes.
Prep Time: 15 minutes
Cook Time: 30 minutes
Total Time: 45 minutes
Yields: 6 servings
This delightful Strawberry Crisp features a fresh and juicy strawberry filling perfectly complemented by a wonderfully crispy oatmeal crumble. It’s a simple yet unforgettable dessert, ideal for any occasion.
Print Recipe
Ingredients
For the Juicy Filling:
- 5 to 6 cups fresh strawberries, hulled and halved (or quartered if very large)
- ¼ cup granulated sugar
- ½ teaspoon pure vanilla extract
- ¼ teaspoon almond extract (optional, but highly recommended for depth of flavor)
- 3 tablespoons cornstarch (to thicken the filling)
For the Crispy Topping:
- 1 cup all-purpose flour
- ¾ cup old-fashioned rolled oats (not instant)
- ½ cup packed light brown sugar
- ⅓ cup granulated sugar
- ½ teaspoon salt
- ¼ teaspoon ground cinnamon
- 10 tablespoons unsalted butter, melted
- 2 tablespoons sliced almonds (optional, for garnish and added crunch)
Instructions
- Preheat Oven and Prepare Dish: Preheat your oven to 350°F (175°C). Lightly grease a 9-inch square baking dish (or a deep-dish pie plate/10-inch cast iron skillet) with cooking spray or butter.
- Prepare the Strawberry Filling: In a medium bowl, combine the prepared strawberries, ¼ cup granulated sugar, vanilla extract, almond extract, and cornstarch. Stir gently until the strawberries are evenly coated. Pour this mixture into your prepared baking dish.
- Make the Crispy Topping: In a separate medium bowl, whisk together the flour, old-fashioned oats, light brown sugar, ⅓ cup granulated sugar, salt, and ground cinnamon. Pour in the melted butter and mix with a fork or your fingertips until the ingredients are well combined and form coarse, crumbly pieces. Evenly sprinkle this topping over the strawberry filling in the baking dish.
- Bake to Perfection: Place the crisp in the preheated oven and bake for 30 to 35 minutes. The crisp is done when the topping is golden brown and the strawberry filling is bubbling invitingly around the edges. If using, sprinkle the sliced almonds over the topping during the last 10 minutes of baking to ensure they toast lightly without burning.
- Serve Warm: Allow the crisp to cool for 5-10 minutes after removing it from the oven to let the filling set slightly and prevent burns. Serve warm, ideally with a generous scoop of vanilla ice cream, a dollop of whipped cream, or your favorite dessert accompaniment. Enjoy!
Nutrition Information (Per Serving)
- Calories: 501kcal
- Carbohydrates: 74g
- Protein: 5g
- Fat: 22g
- Saturated Fat: 12g
- Polyunsaturated Fat: 2g
- Monounsaturated Fat: 6g
- Trans Fat: 1g
- Cholesterol: 50mg
- Sodium: 352mg
- Potassium: 299mg
- Fiber: 4g
- Sugar: 43g
- Vitamin A: 598IU
- Vitamin C: 71mg
- Calcium: 59mg
- Iron: 2mg
Please note: Nutrition information provided is an approximation, automatically calculated and may vary based on specific brands, ingredient choices, and preparation methods. It should be used as a guide only.
Frequently Asked Questions (FAQ) About Strawberry Crisp
Can I substitute other fruits in this crisp recipe?
Absolutely! This crisp recipe is incredibly versatile and serves as a fantastic base for a variety of fruits. While strawberries are delightful, you can easily swap them for other berries like blueberries, raspberries, or blackberries. Stone fruits such as peaches, nectarines, plums, or even pitted cherries work wonderfully. Apples and pears are also excellent choices, particularly in the fall. If using fruits with high water content (like some berries or very ripe peaches), you might consider slightly increasing the cornstarch by half a tablespoon to ensure the filling thickens properly. For firmer fruits like apples, you might want to slice them thinner or even pre-cook them lightly on the stovetop for a few minutes to ensure they soften adequately during baking.
How do I ensure my crisp topping is always crispy and not soggy?
Achieving that perfectly golden and crunchy topping is crucial for an outstanding crisp. Here are several key factors to ensure your topping remains delightfully crispy and avoids sogginess:
- Accurate Ingredient Ratios: Stick closely to the measurements for flour, oats, and butter. Too much butter can make the topping greasy and dense, while too little can make it dry and less cohesive.
- Melted Butter Advantage: Using melted butter, as this recipe calls for, helps coat the dry ingredients more uniformly, which contributes significantly to a crisper texture compared to using cold, cut-in butter (which is more common in crumbles).
- Even Distribution: Ensure you sprinkle the topping evenly over the entire fruit filling. This allows for consistent baking and browning across the surface.
- Hot Oven & Adequate Baking Time: Always ensure your oven is fully preheated to the correct temperature (350°F / 175°C). Bake until the topping is deeply golden brown and, importantly, the fruit filling is actively bubbling vigorously around the edges of the dish. This bubbling is a strong indicator that the fruit juices are thickening properly, and steam is escaping, which helps prevent the topping from becoming soggy.
- Cooling Period: Allow the crisp to cool for at least 15-20 minutes after removing it from the oven before serving. This crucial cooling time allows the filling to set further and the topping to firm up, enhancing its crunch.
Can I make this Strawberry Crisp gluten-free?
Yes, absolutely! It’s quite simple to adapt this delicious crisp to be gluten-free. To do so, you will need to make a couple of straightforward substitutions in the topping. First, replace the all-purpose flour with an equal amount of your favorite gluten-free all-purpose flour blend. When selecting a blend, look for one that specifically states it contains xanthan gum, or if it doesn’t, add about ½ teaspoon of xanthan gum per cup of flour to aid in binding. Secondly, ensure you use certified gluten-free oats, as conventional oats can sometimes be cross-contaminated with wheat during processing. With these changes, your gluten-free strawberry crisp will be just as delightful!
Is it possible to make a vegan version of this recipe?
Indeed! Transforming this into a delectable vegan Strawberry Crisp requires only one simple and easy substitution. You will need to replace the melted unsalted butter in the topping with an equal amount of melted vegan butter or solid coconut oil. Both options work beautifully to achieve that rich, buttery flavor and crispy texture. Ensure all other ingredients (granulated sugar, brown sugar, vanilla extract, almond extract, cornstarch, oats, and flour) are naturally vegan-friendly, which they typically are. The resulting vegan crisp will be just as satisfying, comforting, and utterly delicious, perfect for those following a plant-based diet!
Did you make this delicious Strawberry Crisp?
We’d love to see your culinary creation! Share your experience by leaving a comment below, and don’t forget to tag us @spicysouthernkitchen on social media. Your delicious adventures inspire us all!